
If you are like me, you appreciate smart things. Smart lights, smart thermostats, smart speakers, etc. One problem that can really use a smart solution is home sprinkler systems.
Traditionally, home sprinklers were programmed to come on at the same time and turn off at the same time. Maybe you could set different schedules for each day of the week. Well, that’s great. Sometimes you have a string of cool weather and your soil will stay moist and need less water. Sometimes you will have a lot of sun and heat and require more. Sometimes it rains and you don’t need to water at all.
There is one company in particular that makes an excellent off-the-shelf smart sprinkler, Rachio. There are some advantages to buying a product (like it’s a lot easier.) But building your own will be cheaper and a lot more customizable.
How do sprinkler controllers work?
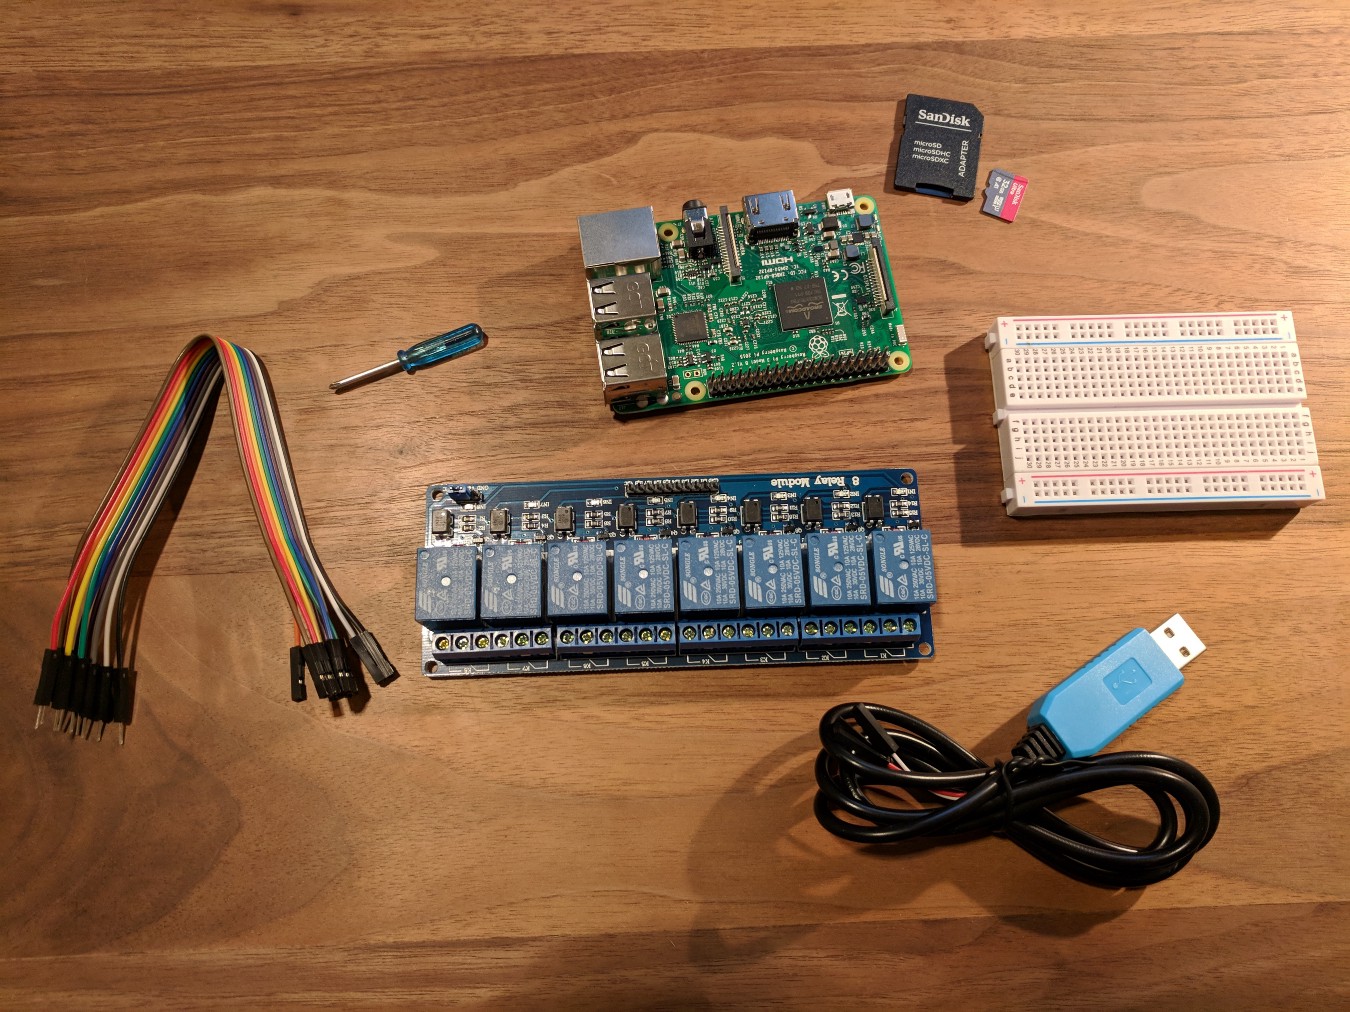
Your sprinkler controller at home is a very simple electro-mechanical device. It relies on a power supply, relays, and solenoids.
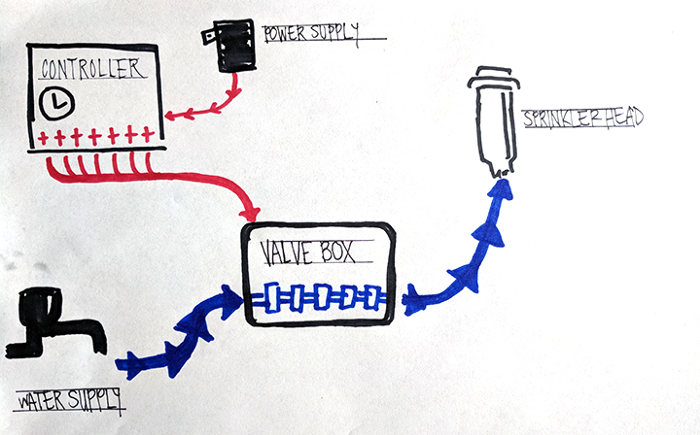
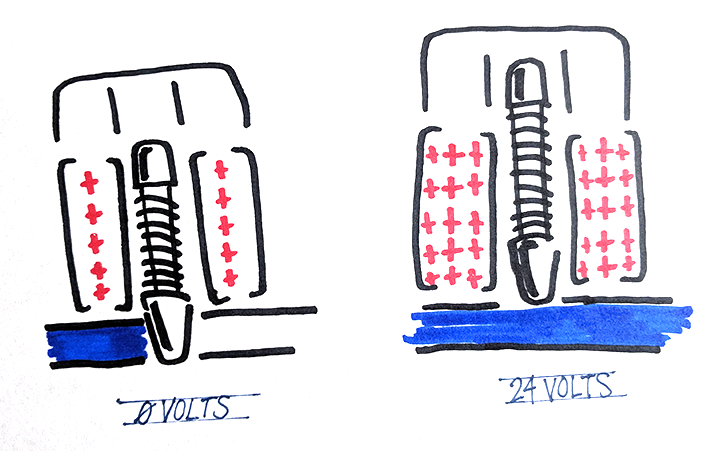
Nearly all sprinkler systems will work off of a 24vAC power supply. Some might go as high as 30v, but the important point to notice here is that this is AC. Almost everything else in your life with a transformer plug these days (some kind of box between the outlet and your device) is converting your wall power (110vAC in the USA) to a lower voltage DC. I don’t want to explain the distinction between the types of power, but let us just say that they are very different.
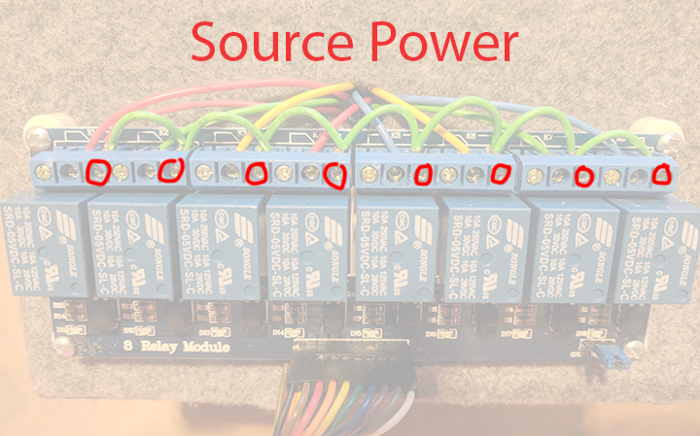
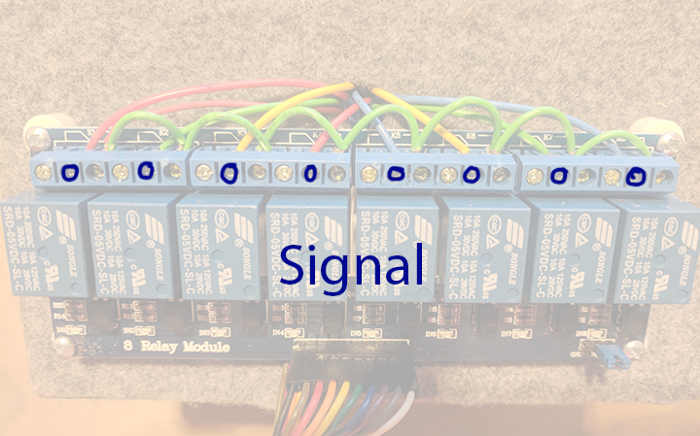
That power supply goes to a box which accepts input for scheduling and contains a series of relays (1 for each zone in your system.)
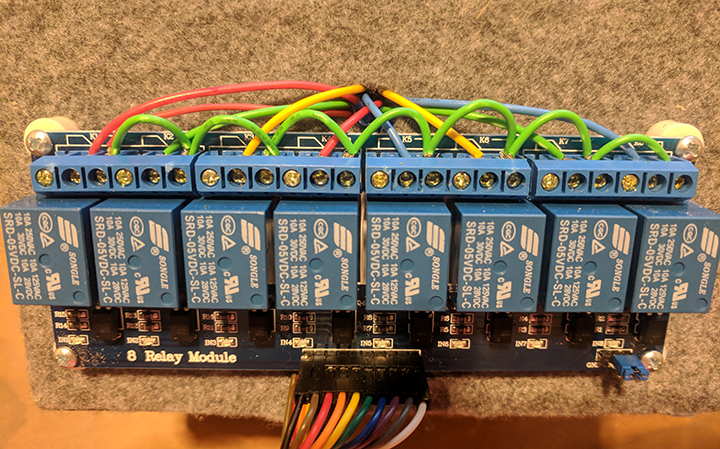
Each relay takes a signal wire and a power wire. The type of current and voltage you can supply vary depending on the relay board. For this project, you just need to get one that can handle 24vAC.
Next stop is the valve box.
Looking inside your valve box you will see a manifold with 2 or 3 or 4 irrigation valves connected to it. Each if these has a common wire and signal wire on it. The common wires are all connected together. The signal wire is the ire coming from your relay.

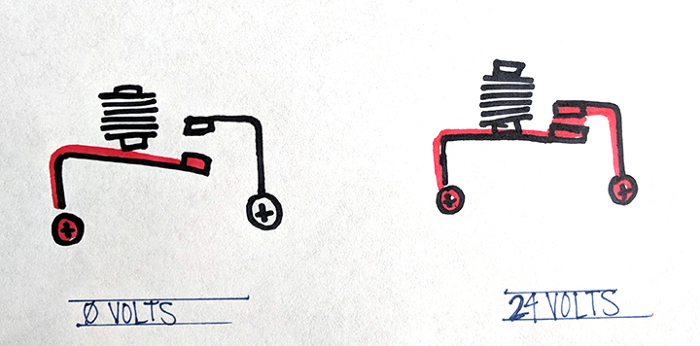
An electromagnetic solenoid works by retracting a plunger when a charge is applied. A spring replaces the plunger when the charge is removed.
As you can see, the system is relatively simple and can be built with basic components.
Writing the software
This is where your sprinklers become smart (or not smart.) The requirements I decided on were:
- Be able to schedule watering duration for each zone.
- Set zones to water on any/all days of the week.
- Be able to set watering for morning and/or evening
- Automatically adjust watering schedule based on weather forecast
You can see the completed code on GitHub, but I will cover some of the highlights.
Weather Forecast
First, we need to create a data store. In this case, I chose an Agent to store the weather data.
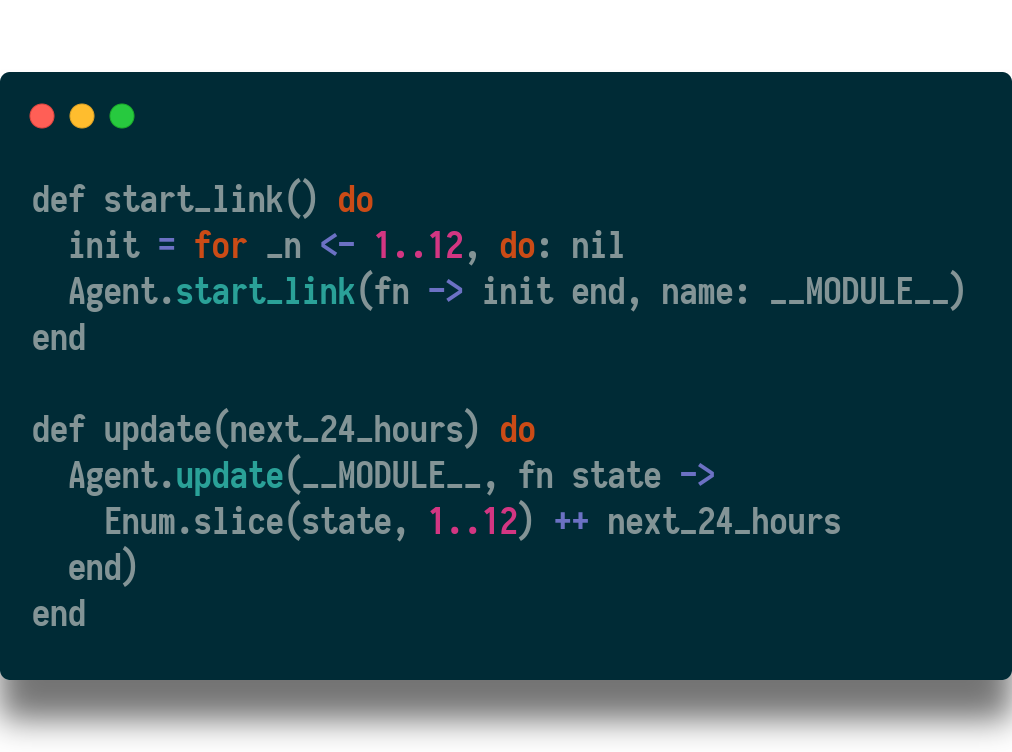
I decided to store the previous 12 hours of weather data in order to keep track if it has rained recently, and then the next 24 hours of weather to determine if conditions were likely that should modify the watering times.
For a really good introduction into Agents, I recommend watching this video from elixircasts.io
The next step is to go out and collect the weather forecast. I chose to use the Darksky API for local weather, but there are many others to chose from.
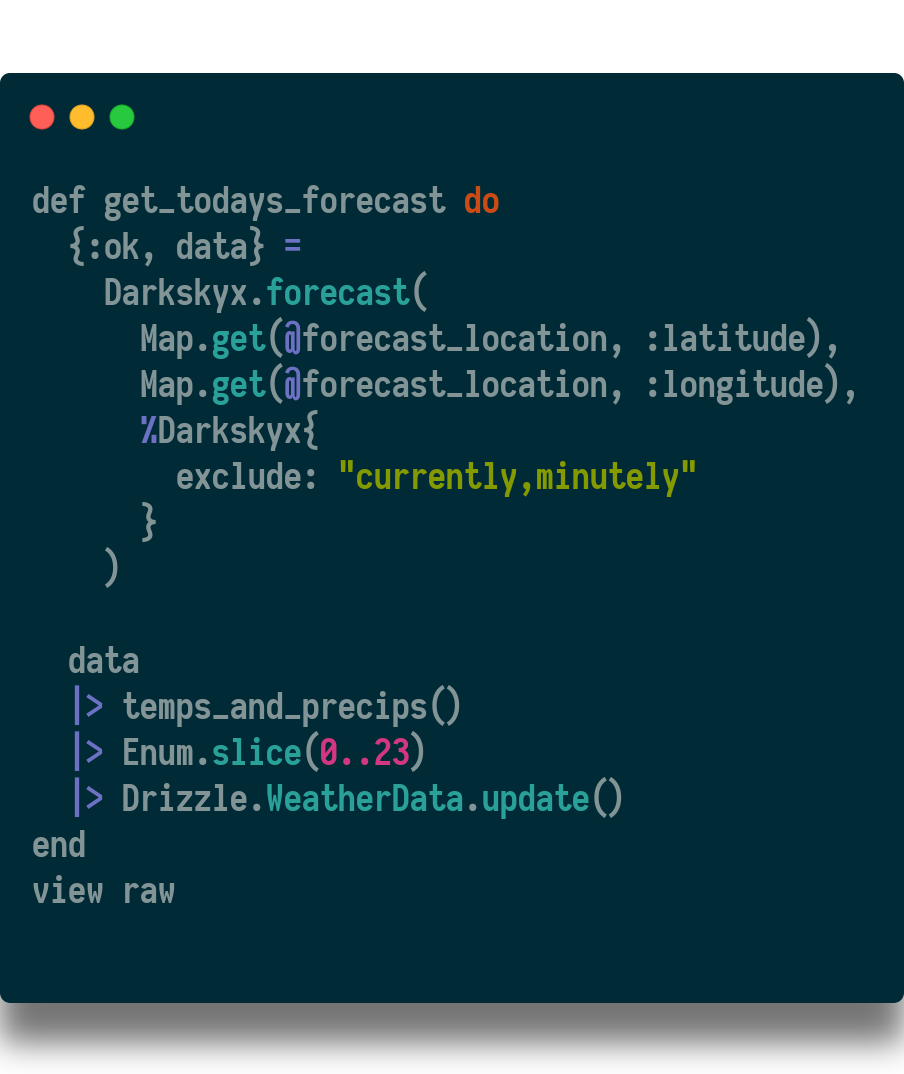
I am saving the temperatures and precipitation forecasts for each of the next 24 hours. The genserver that manages fetching the forecast runs each hour, so after the application has run for 12 hours the weather datastore will have a full 36 hours of forecasts stored.
Scheduling
The watering schedule is set up in the application config. Unfortunately, this means changing the schedule requires updating code and burning new firmware, but I decided it was a good first step.
Each day of the week is represented, and scheduling a zone is just a matter of adding a tuple to that day in the config. The tuple is defined as {zone, part_of_day, duration_in_mins}
Part of day represents a range of hours to allow watering. I chose to allow 5–8am and 9–11pm. When the schedule is built, it will only schedule watering in those blocks.

Being “Smart”
Being smart means modifying the watering schedule when it is raining, or if the weather is too hot or too cold.
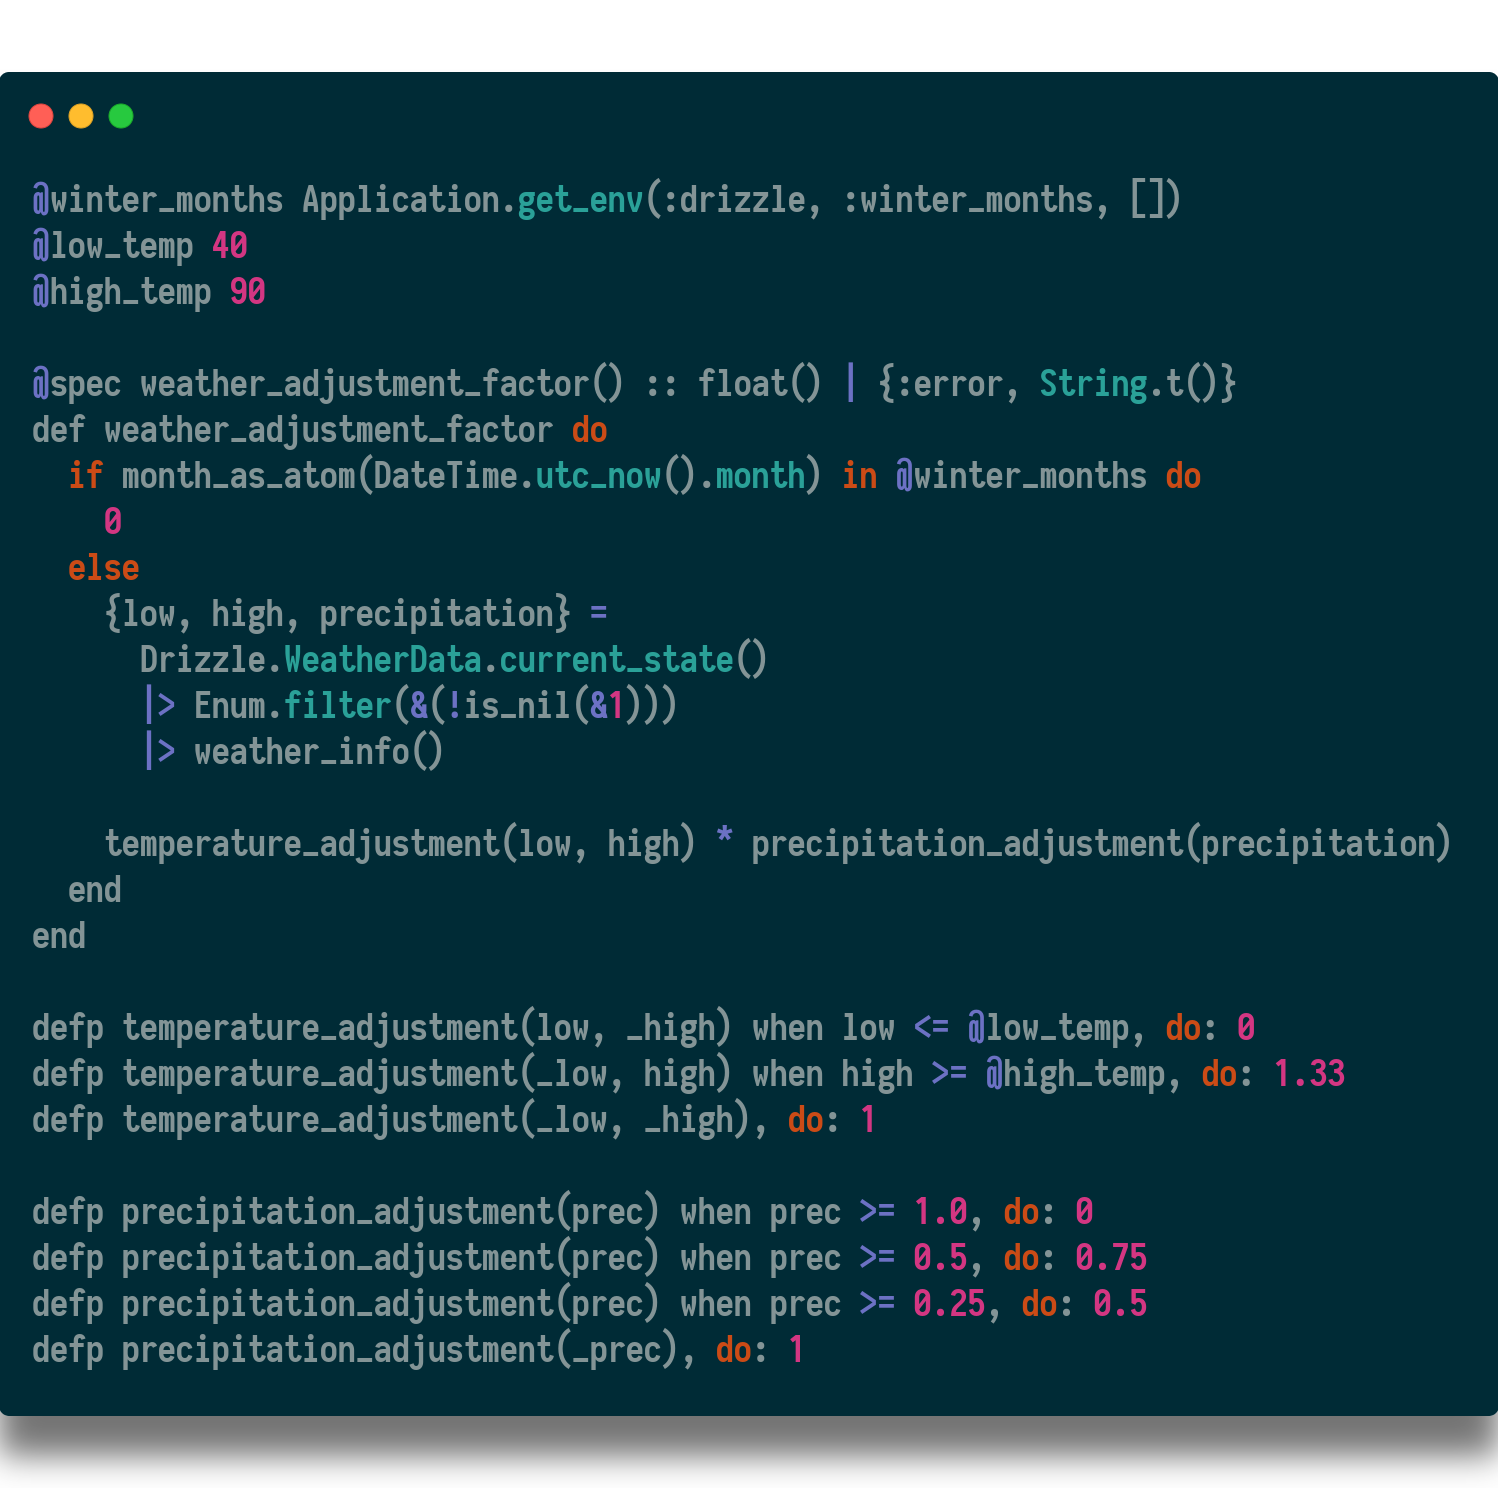
When building the schedule, the configured duration is multiplied by the weather adjustment factor. You can see in the code above the first thing the adjustment factor does is to disable watering in the winter months. Assuming we aren’t currently in the winter months, the temperature can contribute to that factor.
If the temperature falls below the @low_temp the watering is disabled for that hour. If the temperature rises above the @high_temp the watering duration extends by a third.
The same sort of logic follows for precipitation. Depending on the amount of rain forecast, the factor will reduce the watering duration by 25%, 50%, or 100%. The precipitation is determined by likelihood and amount.
Next-level
In order to get more precise data on your lawn conditions you will need additional hardware. The easiest add-on would be 1 or more moisture sensors.
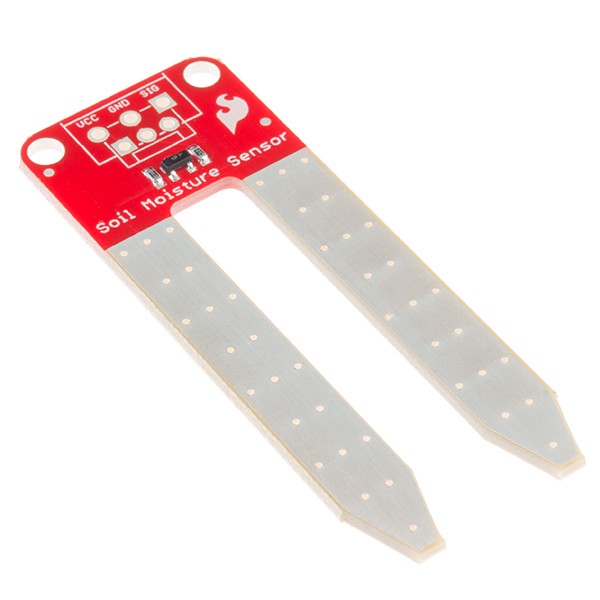
These sensors are buried into your soil and relay the level of moisture back to your Raspberry Pi with wires. It is hard to beat the level of granular data these can give you, however they do require running additional wires to potentially far away places.
Take-aways
I really enjoyed this project. It had a great mix of hardware and software challenges and solved a real problem for me. You can see the entire codebase on GitHub at https://github.com/supersimple/drizzle. The hardware list is on Amazon at http://a.co/3eKUeTQ. And I’d love to hear ideas you have for improving it.
PS. This project was done as part of a monthly remote meetup group. If you’re interested in Nerves and want to learn more, follow the group on Twitter https://twitter.com/NervesMeetup