

Project Overview
I have seen a few implementations of smart mirrors, or magic mirrors, and was interested in building my own. After deciding on what data I wanted to show (time and weather) I considered what technologies to use to build it.
I decided on using an Elixir/Phoenix app. And for the real-time updates, Phoenix LiveView. I had also considered using Nerves and Scenic, which I still think would be a good option.
In case you have missed the multiple keynotes from Chris McCord, he defines this new library this way:
Phoenix LiveView enables rich, real-time user experiences with server-rendered HTML.
As a primarily backend-developer, my knowledge of and confidence in javascript is pretty limited. I have a working knowledge of ECMAScript, but it has been a while and it’s not controversial to say:
if you aren’t paying attention to the javascript community for a few weeks you are probably falling way behind.
The idea of a tool that gives me more rich interactions while only writing Elixir is very attractive.
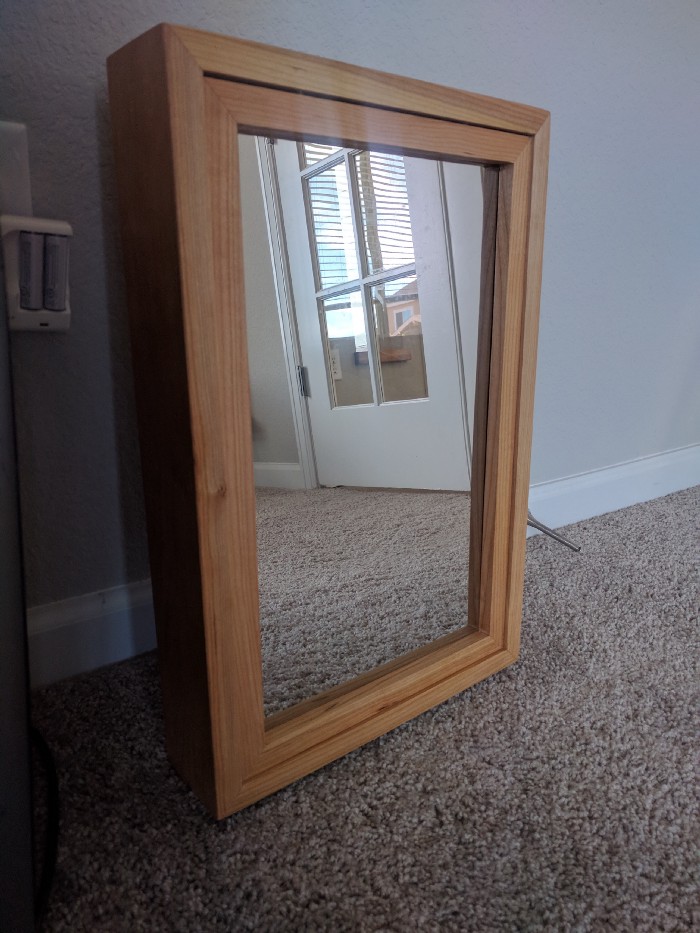
The Hardware
First, let’s talk about the hardware I used for the mirror.

- Spare LED Display. I had a 20” Dell LED (of very average quality laying around.) Any display with HD resolution will be great. The size determines how large your mirror is determined by the screen size. You will need to remove the bezel and stand (like an otter cracking open a clam.) Any gap between the screen surface and back of the mirror will effect the quality.
- Raspberry Pi 3. If you are like most developers I know you already have one of these in your desk drawer.
- 2-Way mirror. You may find this at your local home center or glass shop, but it is also available online.
- A power adapter like this one. This allows you to power the display and the Pi with one outlet.
- HDMI cable and 5v power cable for the Raspberry Pi.
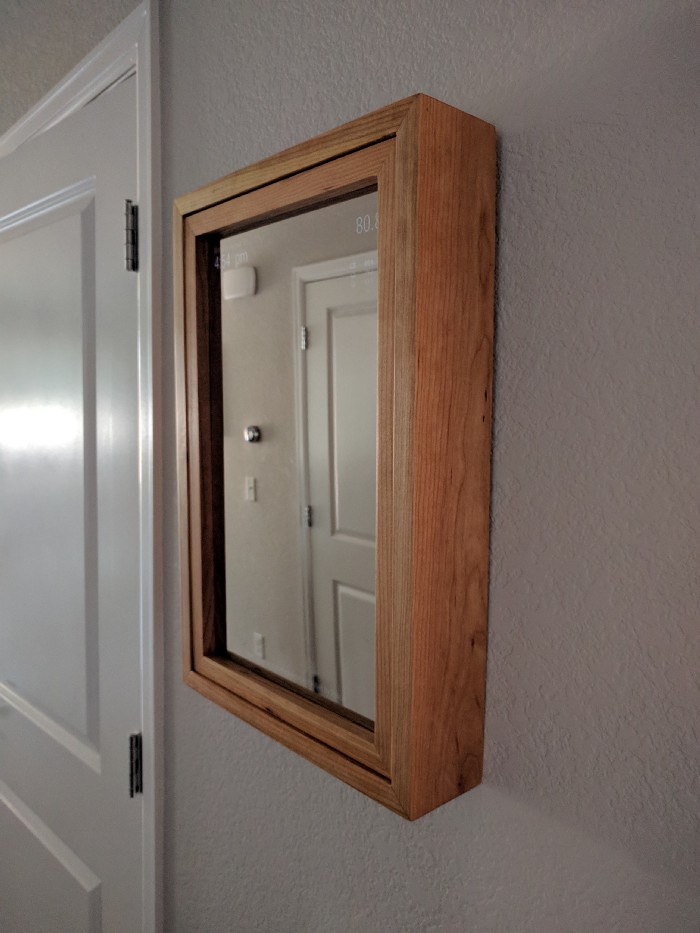
- A Frame. I built this one using cherry. Use your imagination and come up with whatever appeals to you. (Tip: most displays will have threads used for vesa mounts you can use, or just friction fit the display in the frame.)
The Software
The software for this project can be thought of in two parts. Both are important.
Part 1 — The phoenix application
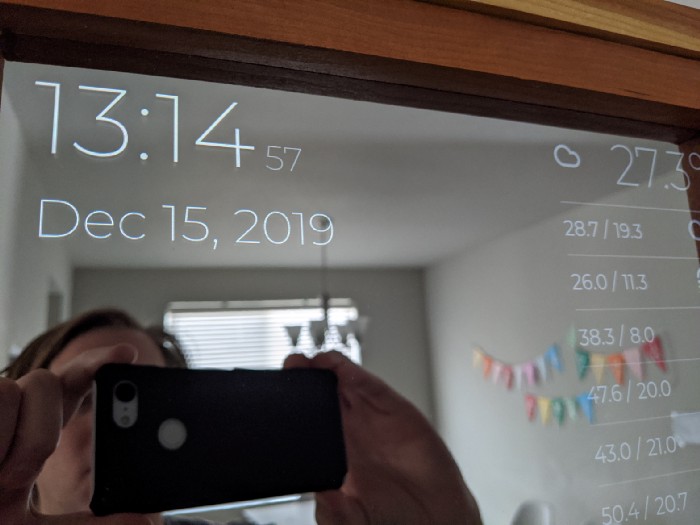
At the heart of this project is an Elixir/Phoenix application. Essentially, what is being displayed is one web page running from a local webserver.
The design is up to you, but you will want to make sure the background is black. Black will allow the mirror to reflect better. For the text to be visible in different lighting conditions I strongly recommend using bright white. In my case, as the weather forecast is further out the text is slightly more grey (to indicate some level of importance.) Making things bolder and bigger and with more contrast will serve you better.
You can see the entire application on GitHub. But I do want to show some of the highlights.
The application uses Phoenix 1.4 and LiveView 0.4.1. A previous iteration used Phoenix channels, which worked great also, but requires a bit more code.
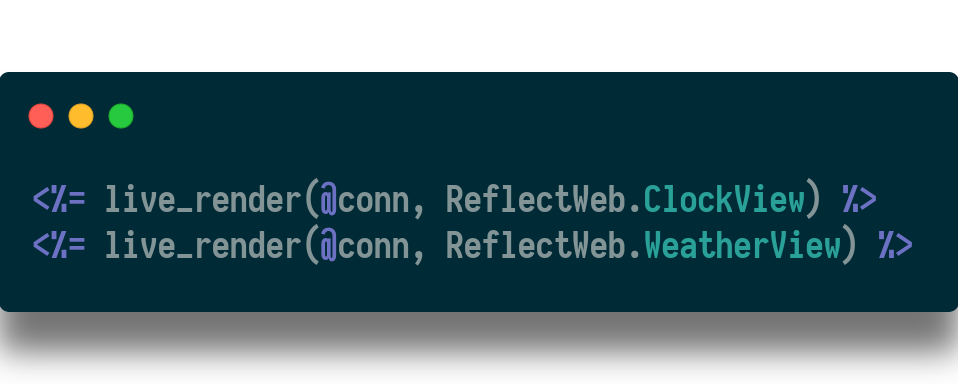
The html view is very simple. Just 2 live_render/2 calls.
And here are each of the liveview components:
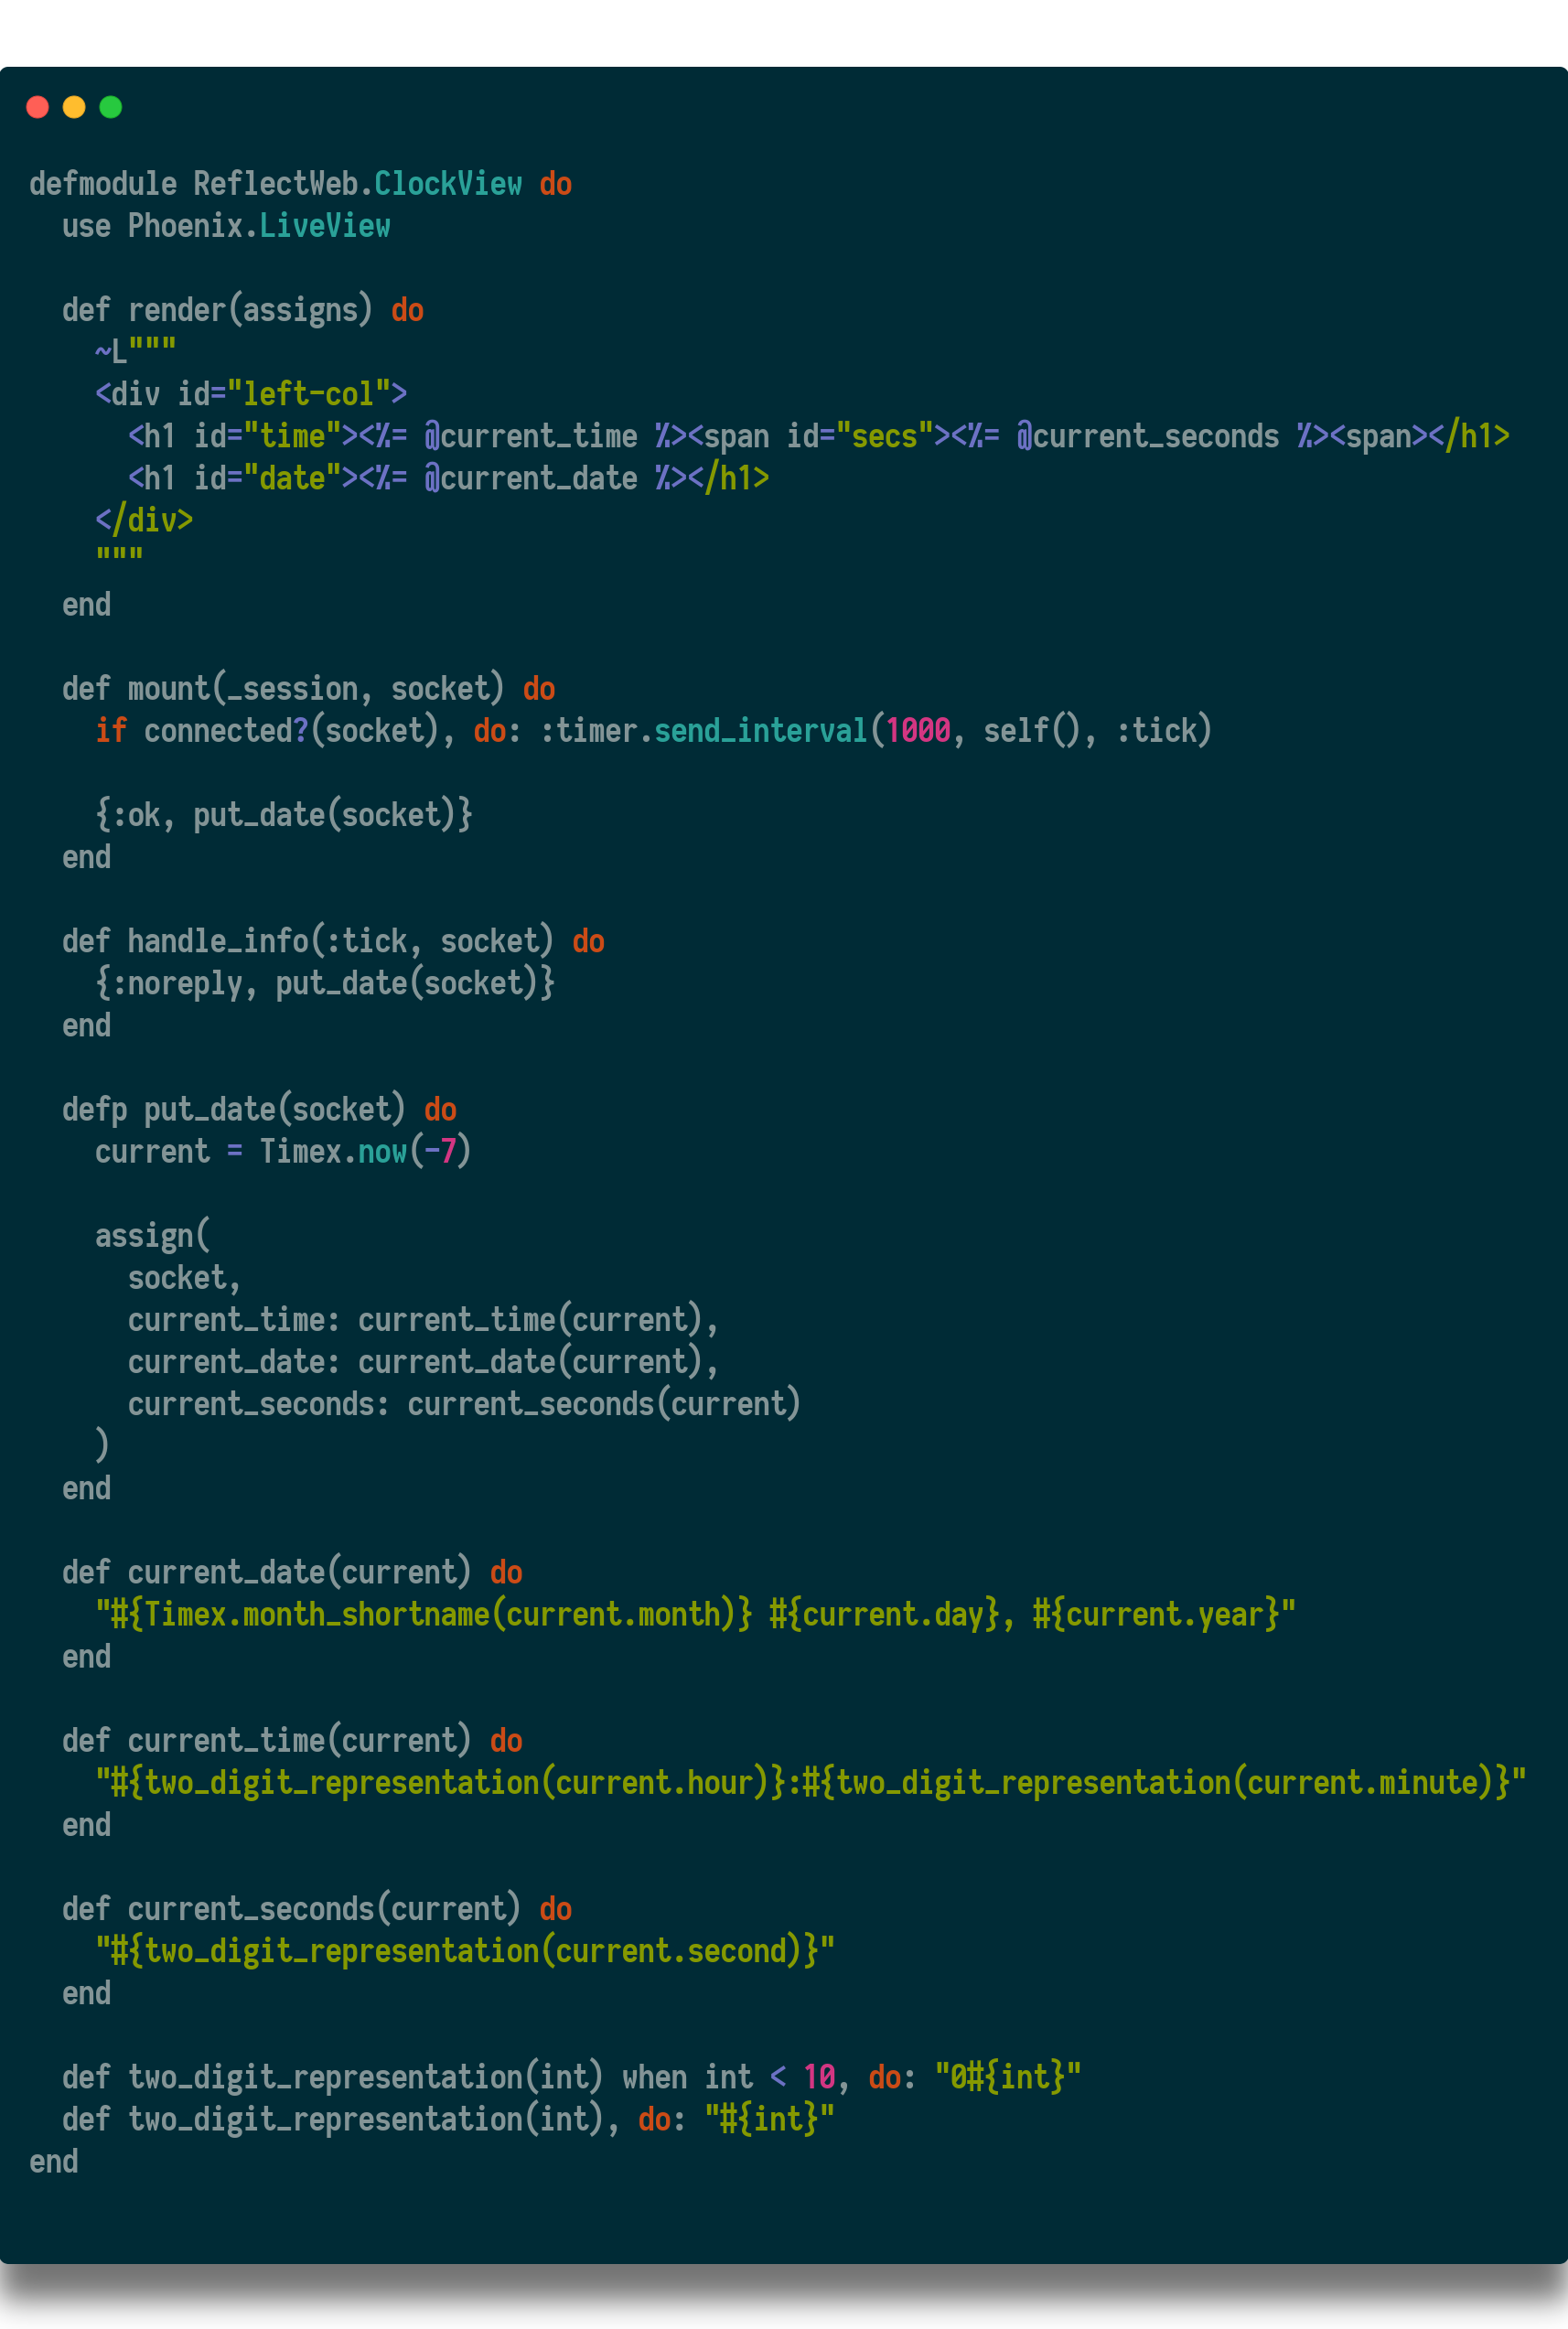

It’s important to note the views are designed to refresh themselves on intervals. For the weather it is every 15 minutes. Obviously the clock needs to be updated more frequently. In this case I am showing hours:minutes:seconds, so it is updating every second.
Part 2 — Raspberry Pi Software
Step 1 is to download an operating system onto your Raspberry Pi. The most common OS, and the one I used is Raspian.
Next, you will need to burn the OS image to your memory card. To do this, download Etcher by Resio.io. It is available for MacOS, Windows, and Linux.
Since this project requires internet access to get weather forecasts, next you will need to setup the Wifi on your Raspberry Pi. You can find detailed instructions on raspberrypi.org, but it is pretty simple.
The quickest way to enable wireless networking is to use the command line raspi-config tool.
sudo raspi-config
Select the Network Options item from the menu, then the Wi-fi option. On a fresh install, for regulatory purposes, you will need to specify the country in which the device is being used. Then set the SSID of the network, and the passphrase for the network.
Next, you will want to set the system time on your Raspberry Pi. From the Raspian desktop, select Menu > Preferences > Raspberry Pi Configuration > Localisation
Since this project will be running in a full screen web browser, we’ll need to download Chromium. To get started, update the package manager and packages with: sudo apt-get update && sudo apt-get upgrade -y
Once that has completed, install chromium and xserver utils; sudo apt-get install chromium-browser x11-xserver-utils
You will also want to install unclutter and git (if you want to pull code changes down.)
And then get erlang and elixir installed. There are very succinct instructions available on elixir-lang.org. Erlang Solutions also has very thorough instructions on building a beam server on a Raspberry Pi (or any other ARM processor computer.)
Now we will setup SSH. You can find detailed instructions on raspberrypi.org. In Terminal type: ifconfig . Make note of the IP next to the line that starts wlan0
Now you should be able to access your Pi via SSH. From another computer, type: ssh pi@<IP-ADDRESS-HERE>
The default password is: raspberrypi
Almost done.
On the Pi terminal, type: raspi-config and activate the option for “wait for network”. While you are there, this is a good opportunity to change your password from the default to something a little more secure.
The last step is to change some config files on the Raspberry Pi.
There are some special files used by the Raspberry Pi OS to startup the machine and put into a proper kiosk mode.
Type: sudo nano /etc/lightdm/lightdm.conf Look for the line that starts with xserver-command and change it to:
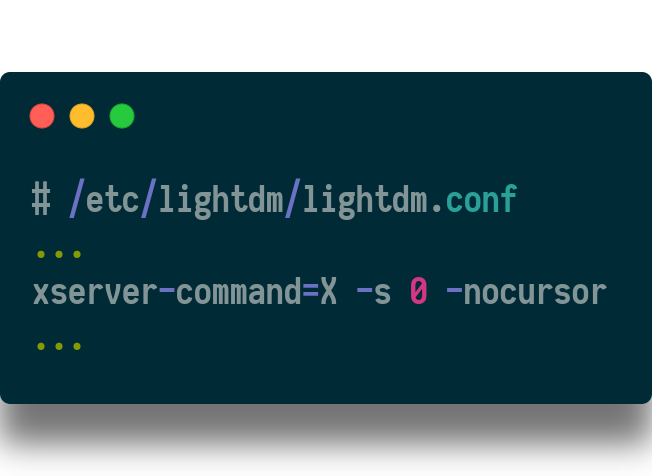
This will tell the Pi not to go to sleep and not show a cursor.
Type: sudo nano ~/.config/lxsession/LXDE-pi/autostart. Depending on which version of Raspian you are using, this file may or may not already exist. The file should contain the following code:
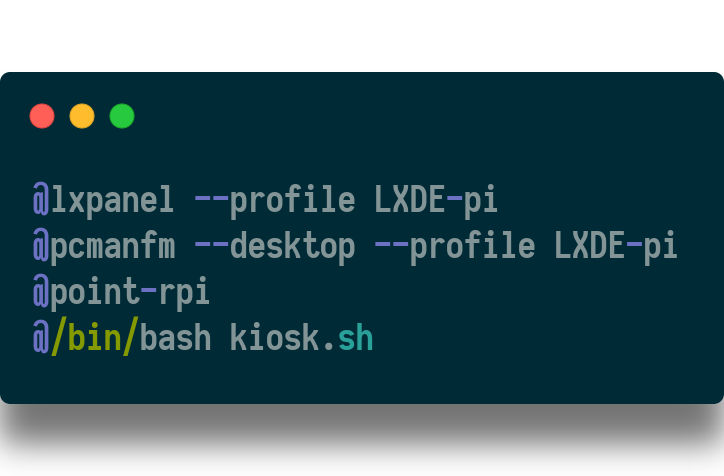
This tells the Pi to call the kiosk.sh script on startup.
Now, create that file: sudo nano ~/kiosk.sh. It should contain this code:
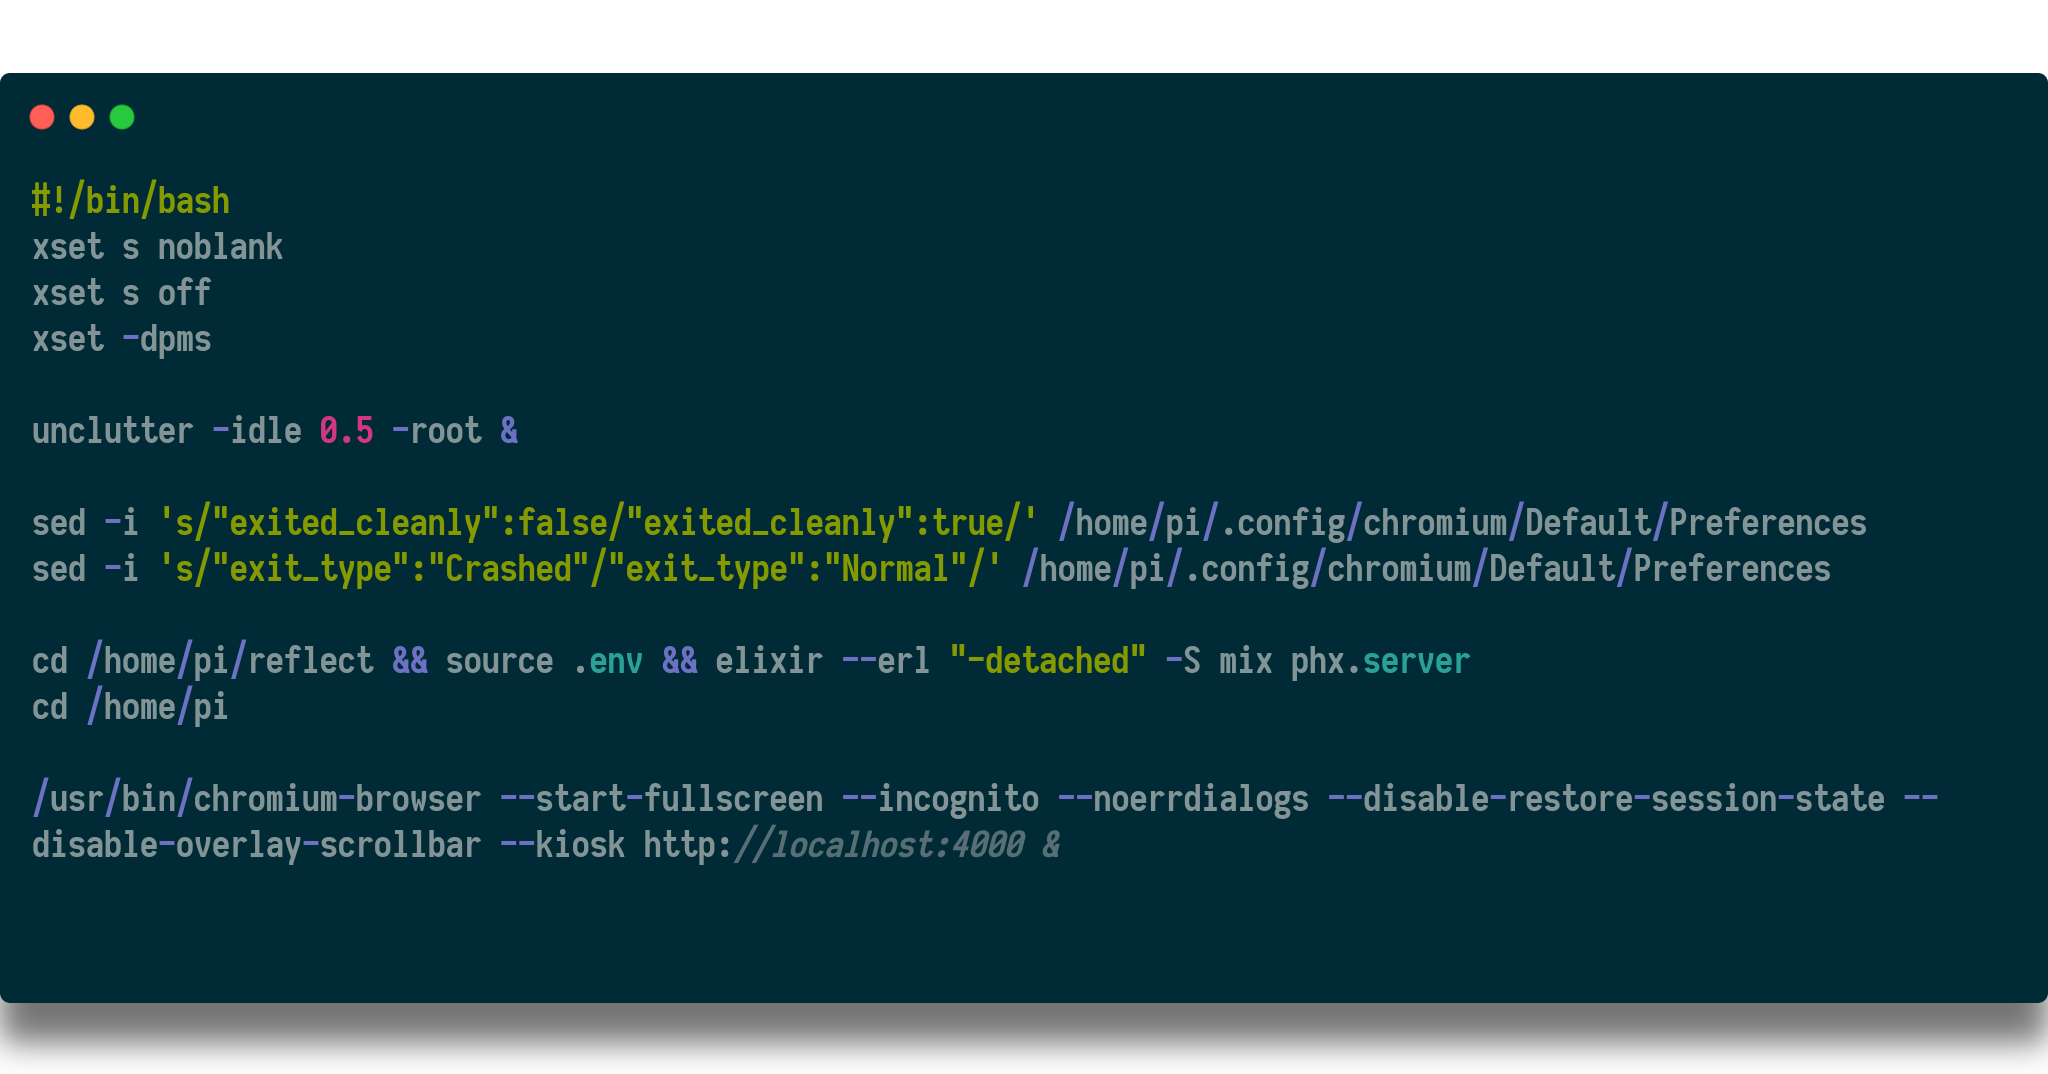
This file call unclutter, which hides the cursor after 0.5 seconds of inactivity. It also makes sure Chromium will not show pop-up warnings in the case of not shutting down properly. Finally, it loads the environment variables it needs from a file named .env and it starts up a server using mix.
There are different ways to run a webserver. Mix is the most basic, but also the easiest. Since there will only be 1 client connected at any point I didn’t see a need for anything fancier.
Thanks!
I hope this inspires you to build your own smart mirror. Projects like these are a fun way to spend a weekend and let you spread your wings a little with new ideas. If you do build one, I’d love to hear about it!